TAKING FLIGHT
Bakasana/Crow is one of my favorite arm balancing poses. I remember the feeling of achievement when I finally took flight after many failed attempts and tumbles. While yoga poses are not to be conquered and ticked off a list, they do give you the opportunity to challenge yourself and feel proud of yourself. As long as you don’t grasp at poses that are not suitable for you or have no benefits for you beyond making shapes. Arm balances teach you the principles of finding balance physically in your practice and mentally in your everyday lives. Learning when you fall you can get back up and keep going is all part of yoga and life practice. If we didn’t face challenges we wouldn’t learn how to deal with difficult situations. Remember, no matter how gracefully the person beside you pops up into crow pose, they have their own challenges that yoga offers them. It is recommended that you can hold Adho Mukha Svanasana/Downward Dog and Phlankasana/Plank comfortably before you consider putting the full weight of your body on your wrist joint.
THE BENEFITS OF BAKASANA/CROW
Bakasana/Crow gives the opportunity to take an arm balance with a smaller distance from the ground than bigger arm balances like Adho Mukha Vrksasana/Handstand. Bakasana/Crow strengthens the shoulder, arms, core, hip flexors, glutes, groins and hamstrings and stretches the spine. It builds confidence, stamina, focus, concentration and coordination; boosts circulation, the immune system and energy levels. A strong, reactive and supple core will help you to take a controlled lift and find your centre of gravity. Good news is that it’s the foundation pose of lots of other arm balancing poses – so once you grasp it, it opens up a whole range of poses to you.
EXPLORING BAKASANA/CROW IN YOUR PRACTICE
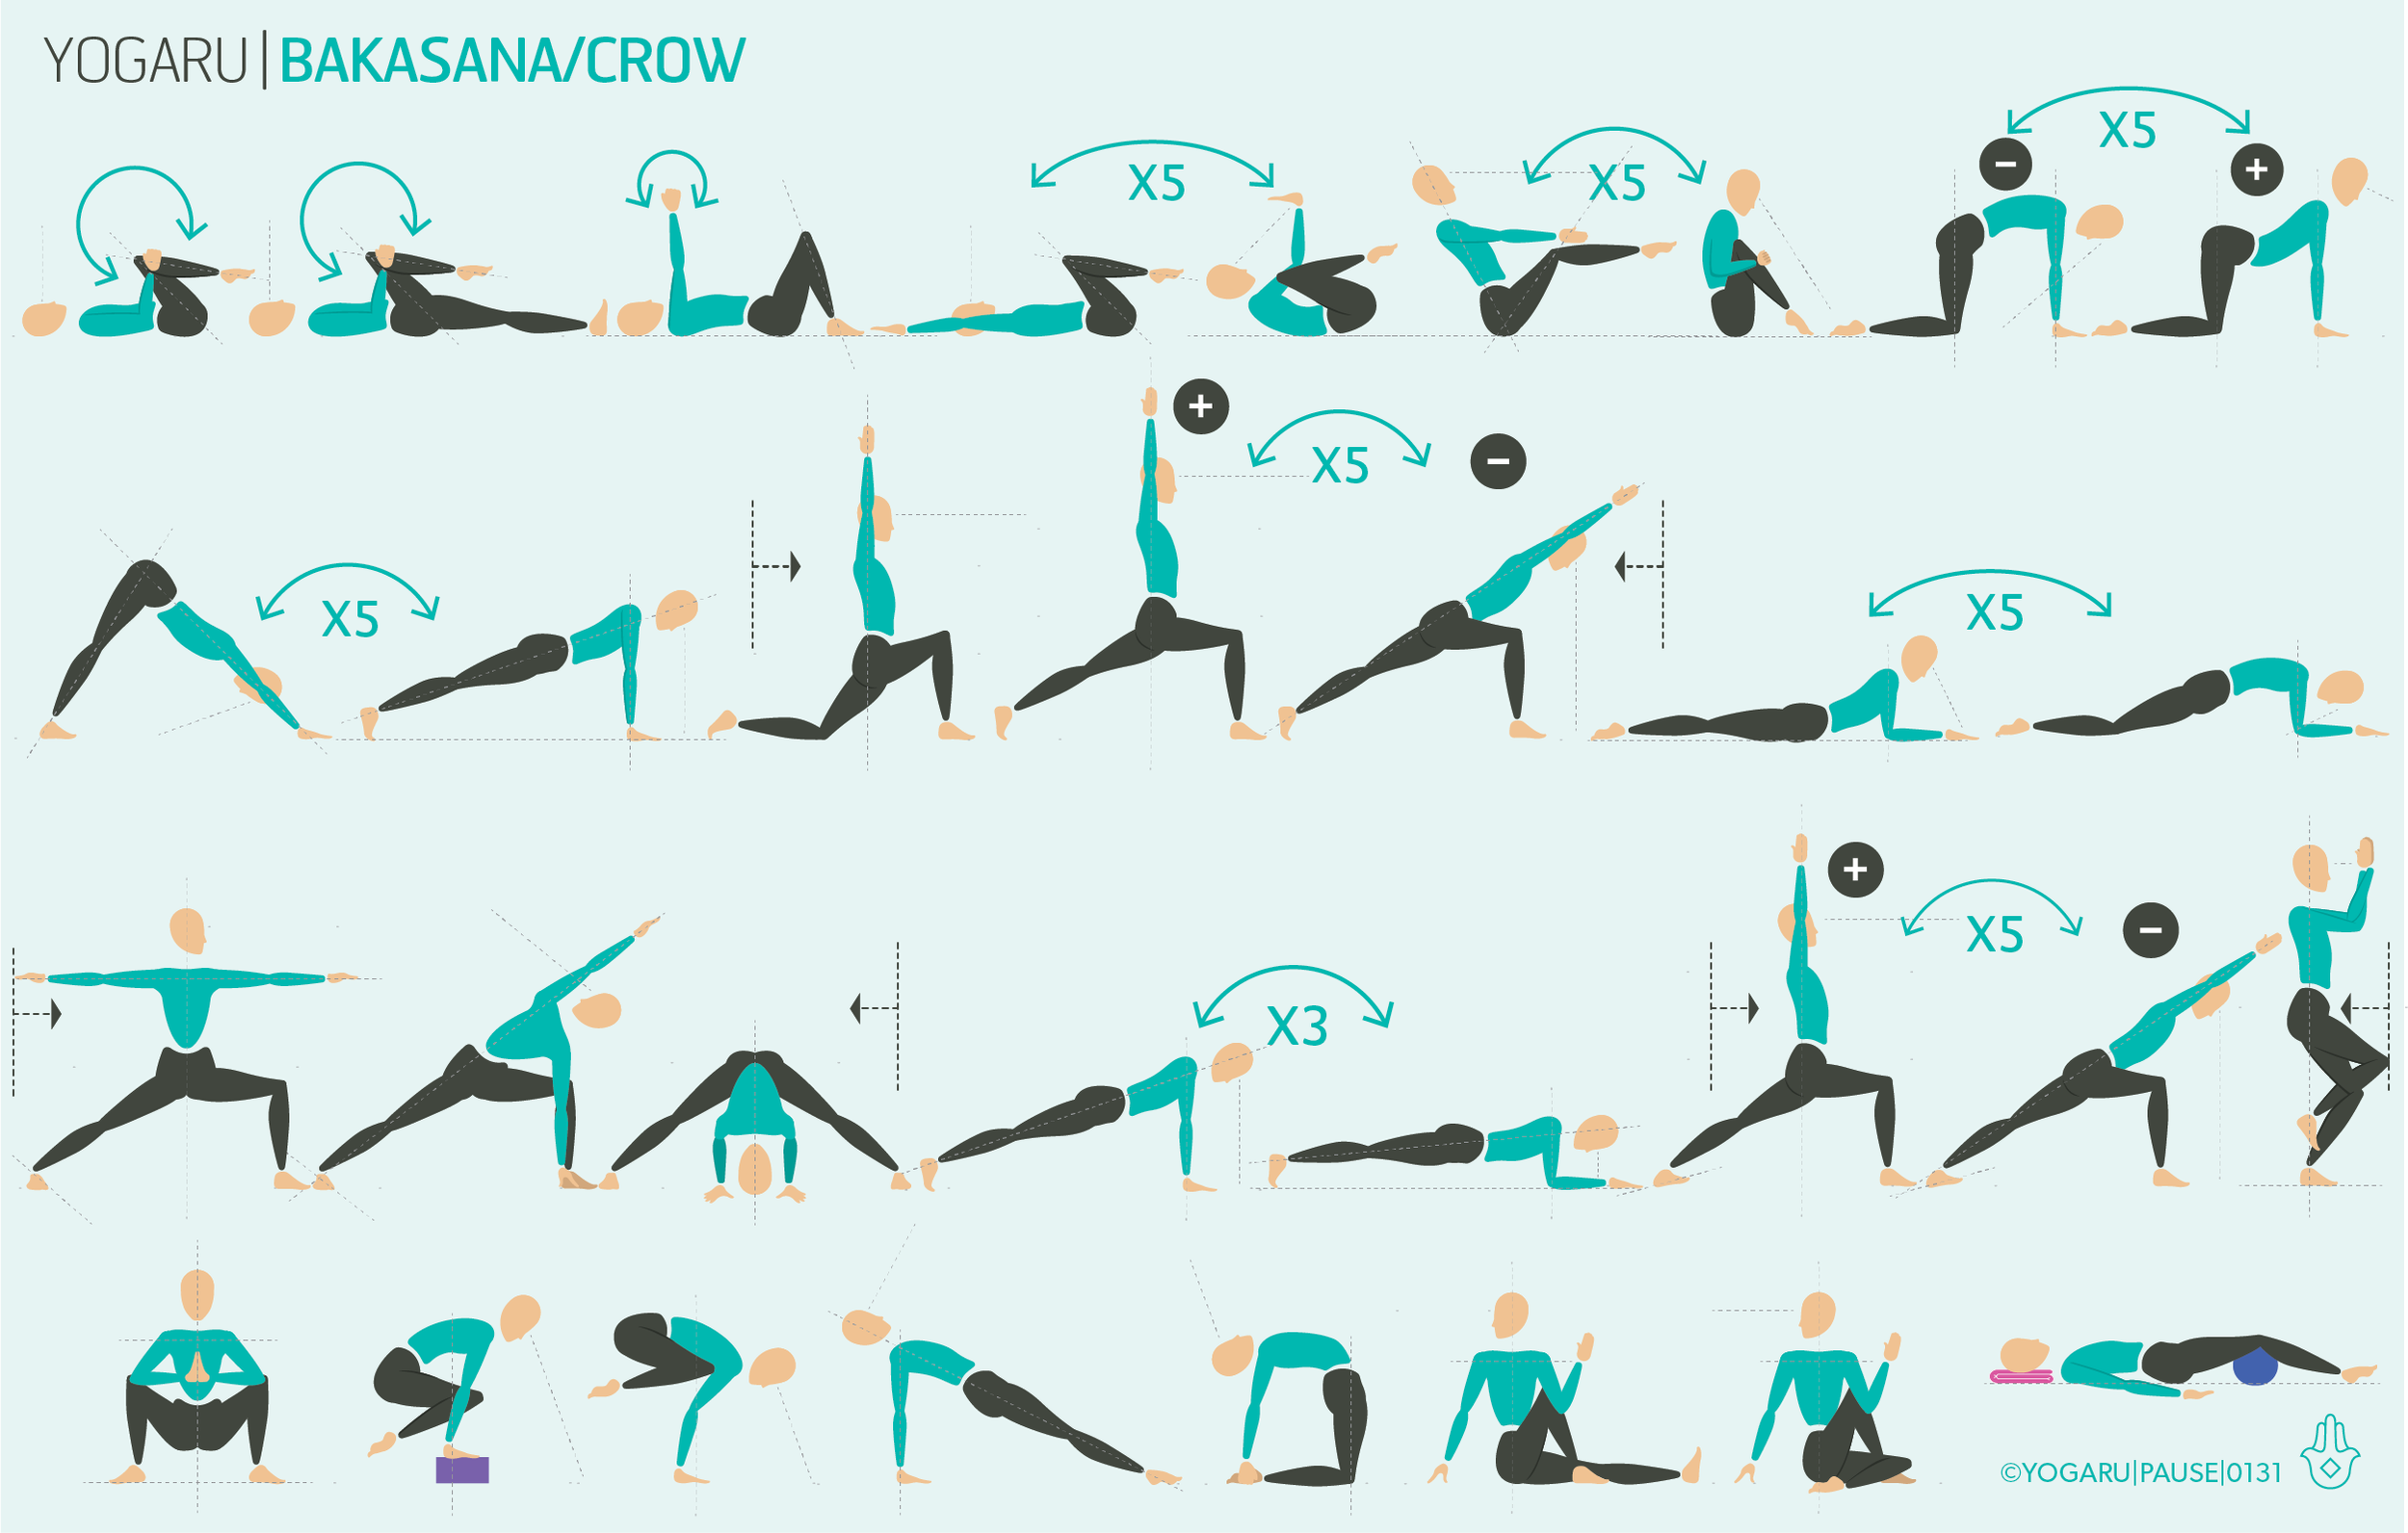
Journeying into Bakasana/Crow with awareness of the different areas that need to be prepared makes it easier to give it your best shot. As you run through the prep poses, notice if there are particular ones that you find more difficult, spend a bit more time on these poses and breathe deeply in them.
If taking flight in Bakasana/Crow is completely out of your comfort zone, place a pillow or blanket on the ground in front of you, most people find that they have the courage to lift up if they have an insurance policy for potential face planting! Practice Lolasana/Dangling Earing on blocks first to work on your core and hand strength. For your first Bakasana/Crow lift the feet up one at a time to start with and work upto lifting both feet together. When you’re lifting up, if the second foot isn’t ready to follow, practice lifting the right foot first, hold for a few breaths and then lift the left foot and hold. Play with your centre of gravity by tipping your weight forward. Like the principles of a seesaw eventually the legs start to feel light as the arms take the body weight.
ALIGNMENT CUES
You will start to prepare yourself for Bakasana/Crow from the start of the sequence to make sure you are ready to give it your best shot. If Bakasana/Crow is not a pose for you, concentrate on the rest of the sequence which will give you all benefits of Bakasana/Crow distributed amongst a collection of other poses. You will have two opportunities to try Bakasana/Crow, you can add more rounds or just do one depending on your energy levels.
Have a read of the tips below and either print out the sequence or save it onto your device:
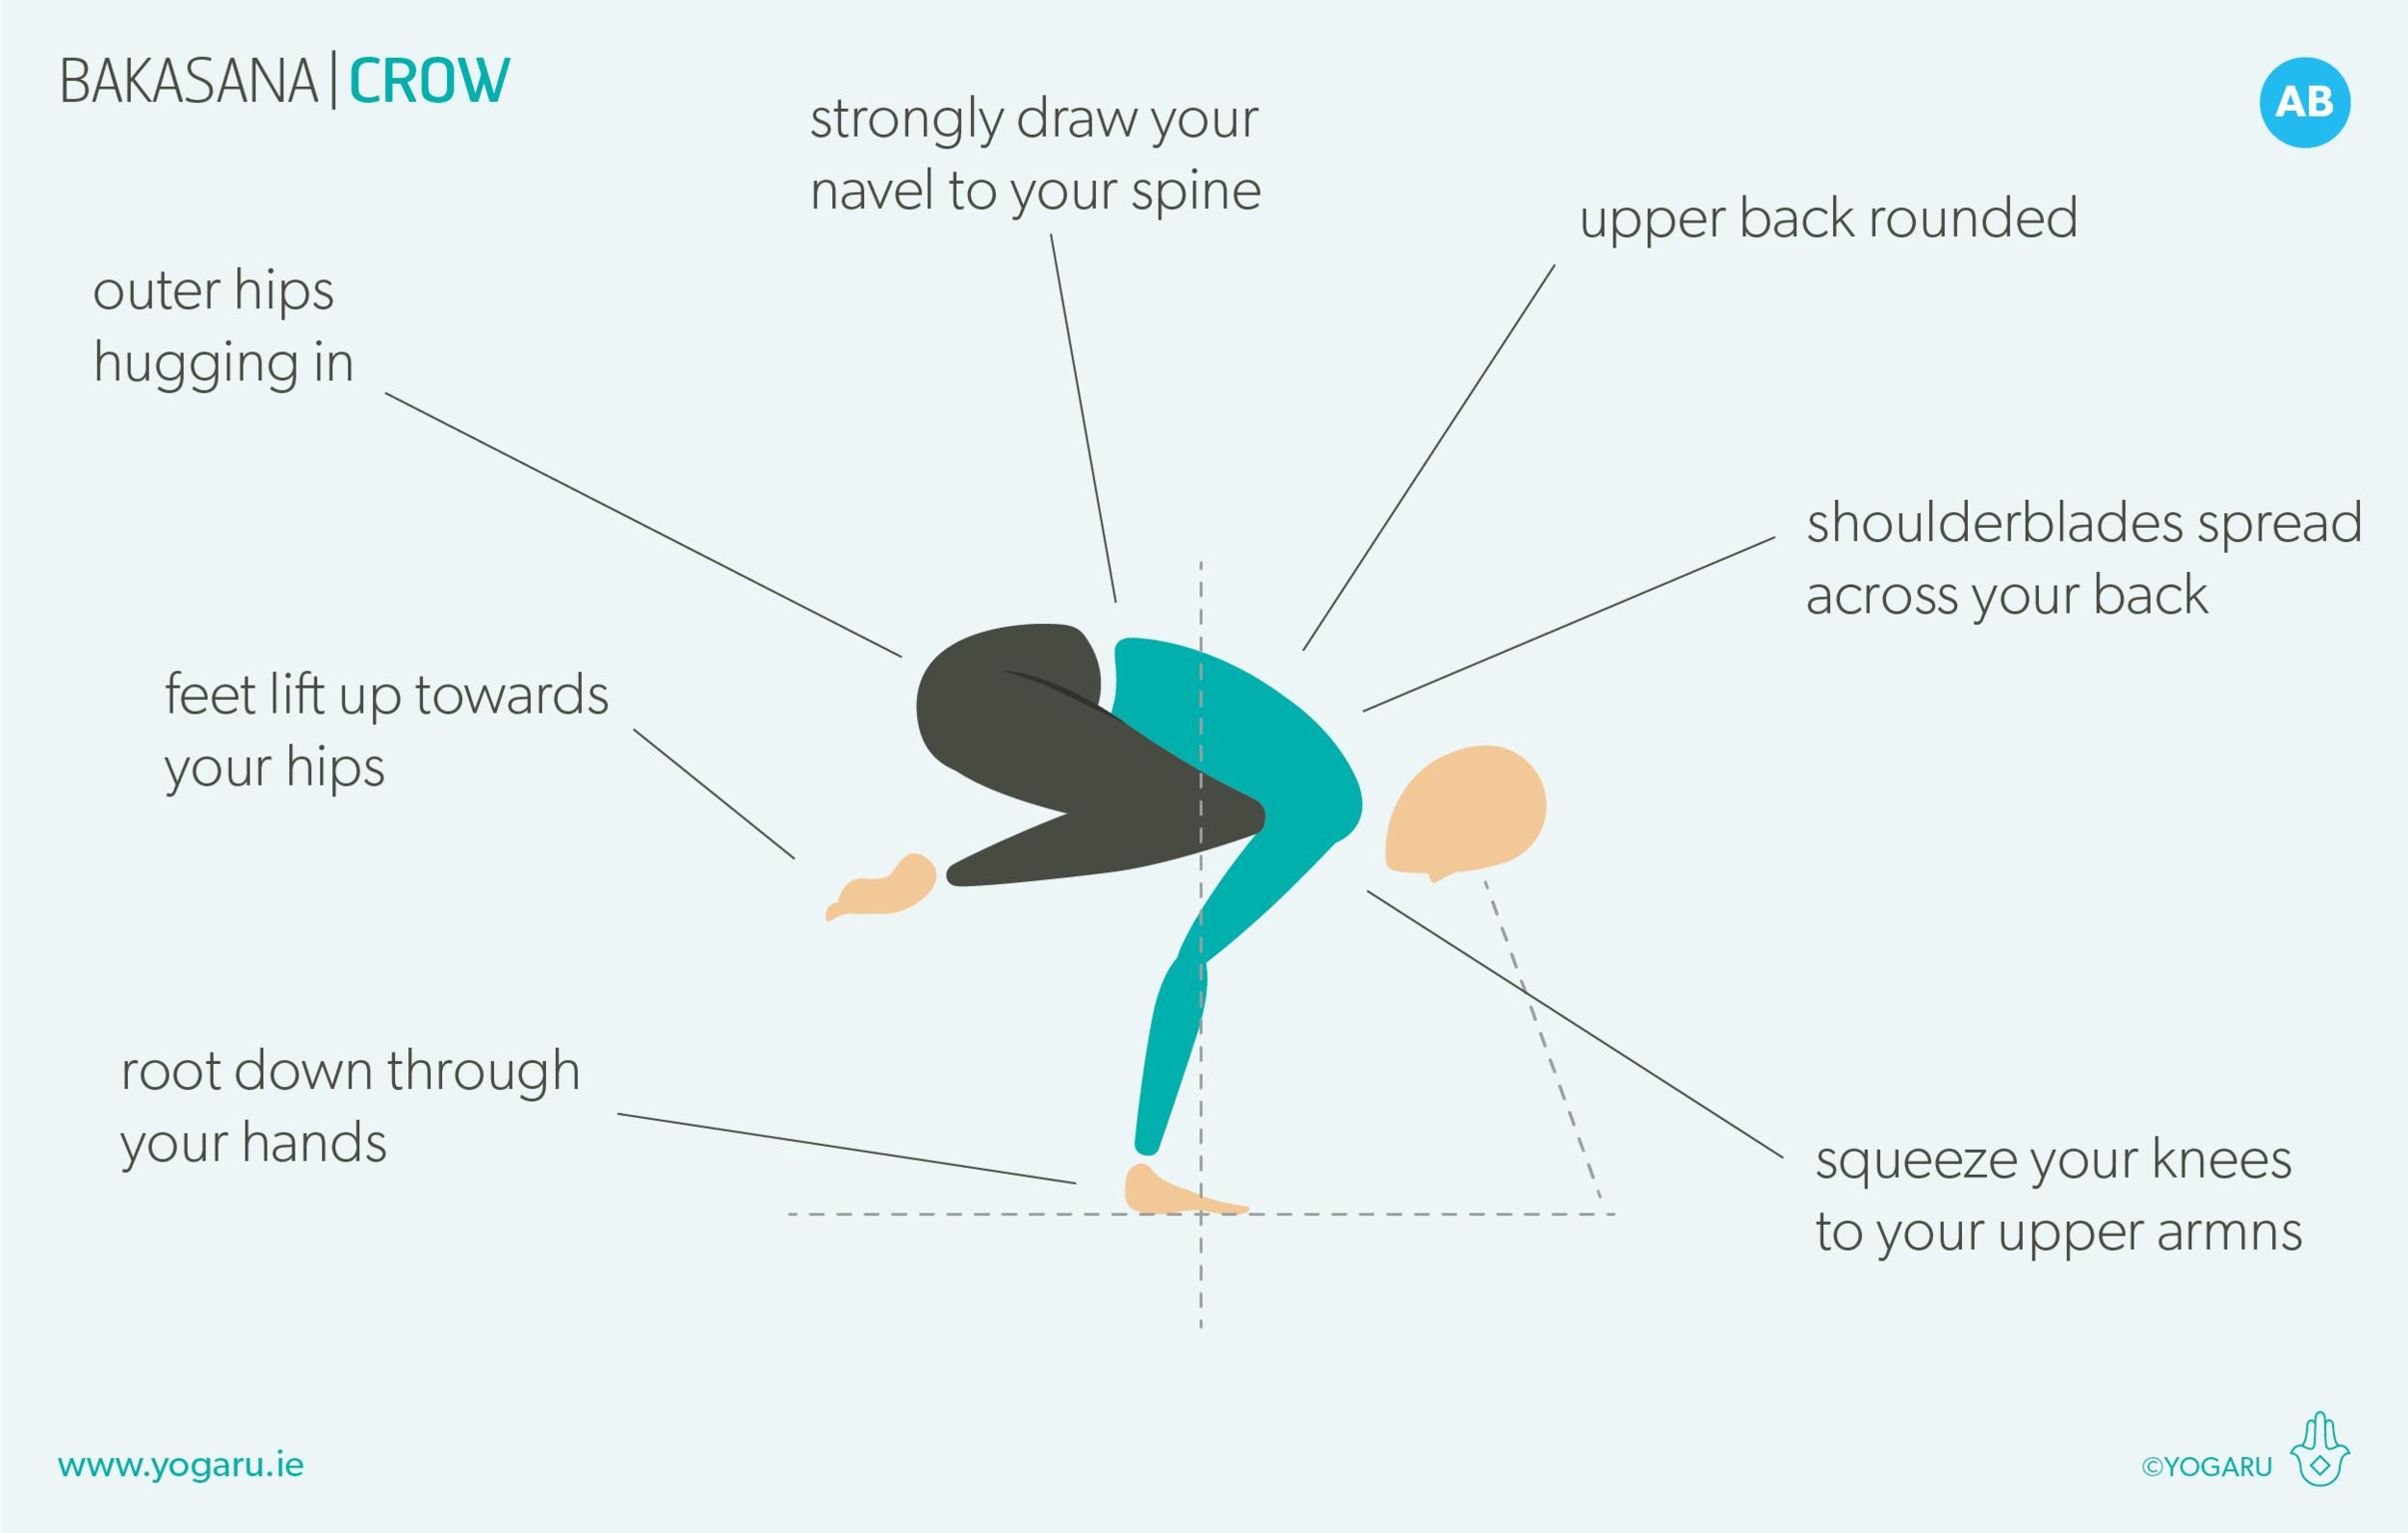
From Malasana/Squat, step your feet together, bend your elbows and place your hands forward on the ground, shoulder width apart.
Place your knees high up on your upper arms, hug your knees to your arms.
Strongly draw your navel towards your spine, round your upper back.
Lean forward and shift your weight into your hands, lift your hips up high.
Exhale, lift up onto the balls of your feet, with control lift your feet up towards your buttocks, one at a time or both together, working towards straightening your arms, press into your hands, gaze slightly forward.
To save the images for personal use click and hold down the image until the ‘save image’ option appears; on Mac hold down ‘control’ and click the image to get the option box; on PC right click on the image to get the option box. Scroll down in the ‘option box’ and click ‘save image’.
Ruth Delahunty Yogaru


