SUN SALUTATION ROOTS
The origins of the Sun Salutation/Surya Namaskara are uncertain. The earliest text illustrating the classic Sun Salutation we practise today, was written in the 1930s by Krishnamacharya. But it is not known if he was simply recording a sequence handed down for centuries from teacher to teacher or if he created it himself. He went on to teach the sequence to his students, including K. Pattabhi Jois and K.B.S Iyengar.
Traditionally practised in the morning as a salute to the rising sun, the Sun Salutation/Surya Namaskara is multi functional and can actually be practised at any time of the day. When practised in the morning it wakes up the system and gets you ready for the day ahead. Practised in the evening it helps you unwind and relax. It is the perfect way to start building a home practice. The three versions strengthen and stretch all the main muscle groups, build stamina and prepare for more challenging asana. They also build heat and increase circulation throughout the whole system, which aids digestion and benefits all the internal organs.
The repetitive and meditative quality of the movements relaxes the mind and body, reducing stress and anxiety and increasing mental clarity. As you move through each pose in the Sun Salutation/Surya Namaskara, you take either an in-breath or an out-breath. This makes it a good start to your practice and establishes the link between the breath and the movement. When done slowly it also encourages a calm breath which triggers the parasympathetic nervous system.
There are three main versions of Sun Salutation/Surya Namaskara. Sun Salutation/Surya Namaskara C, also called Sun Salutation/Surya Namaskara Classic, is the best version to start any practice with. You step back from your first Forward Fold/Uttanasana, to Anjaneyasana/Low Lunge, which is kinder on the joints while you give your system a chance to warm up. It also offers a softer decline to the floor through Knees, Chest, Chin, rather than Chaturanga Dandasana/Four Limb Pose. Coming all the way down to the ground offers a gentler backbend with Bhujangasana/Cobra, instead of a full Urdhva Mukha Svanasana/Upward Facing Dog. You can also incorporate a soft bend in the knees for the forward folds, allowing time for the hamstrings to warm up.
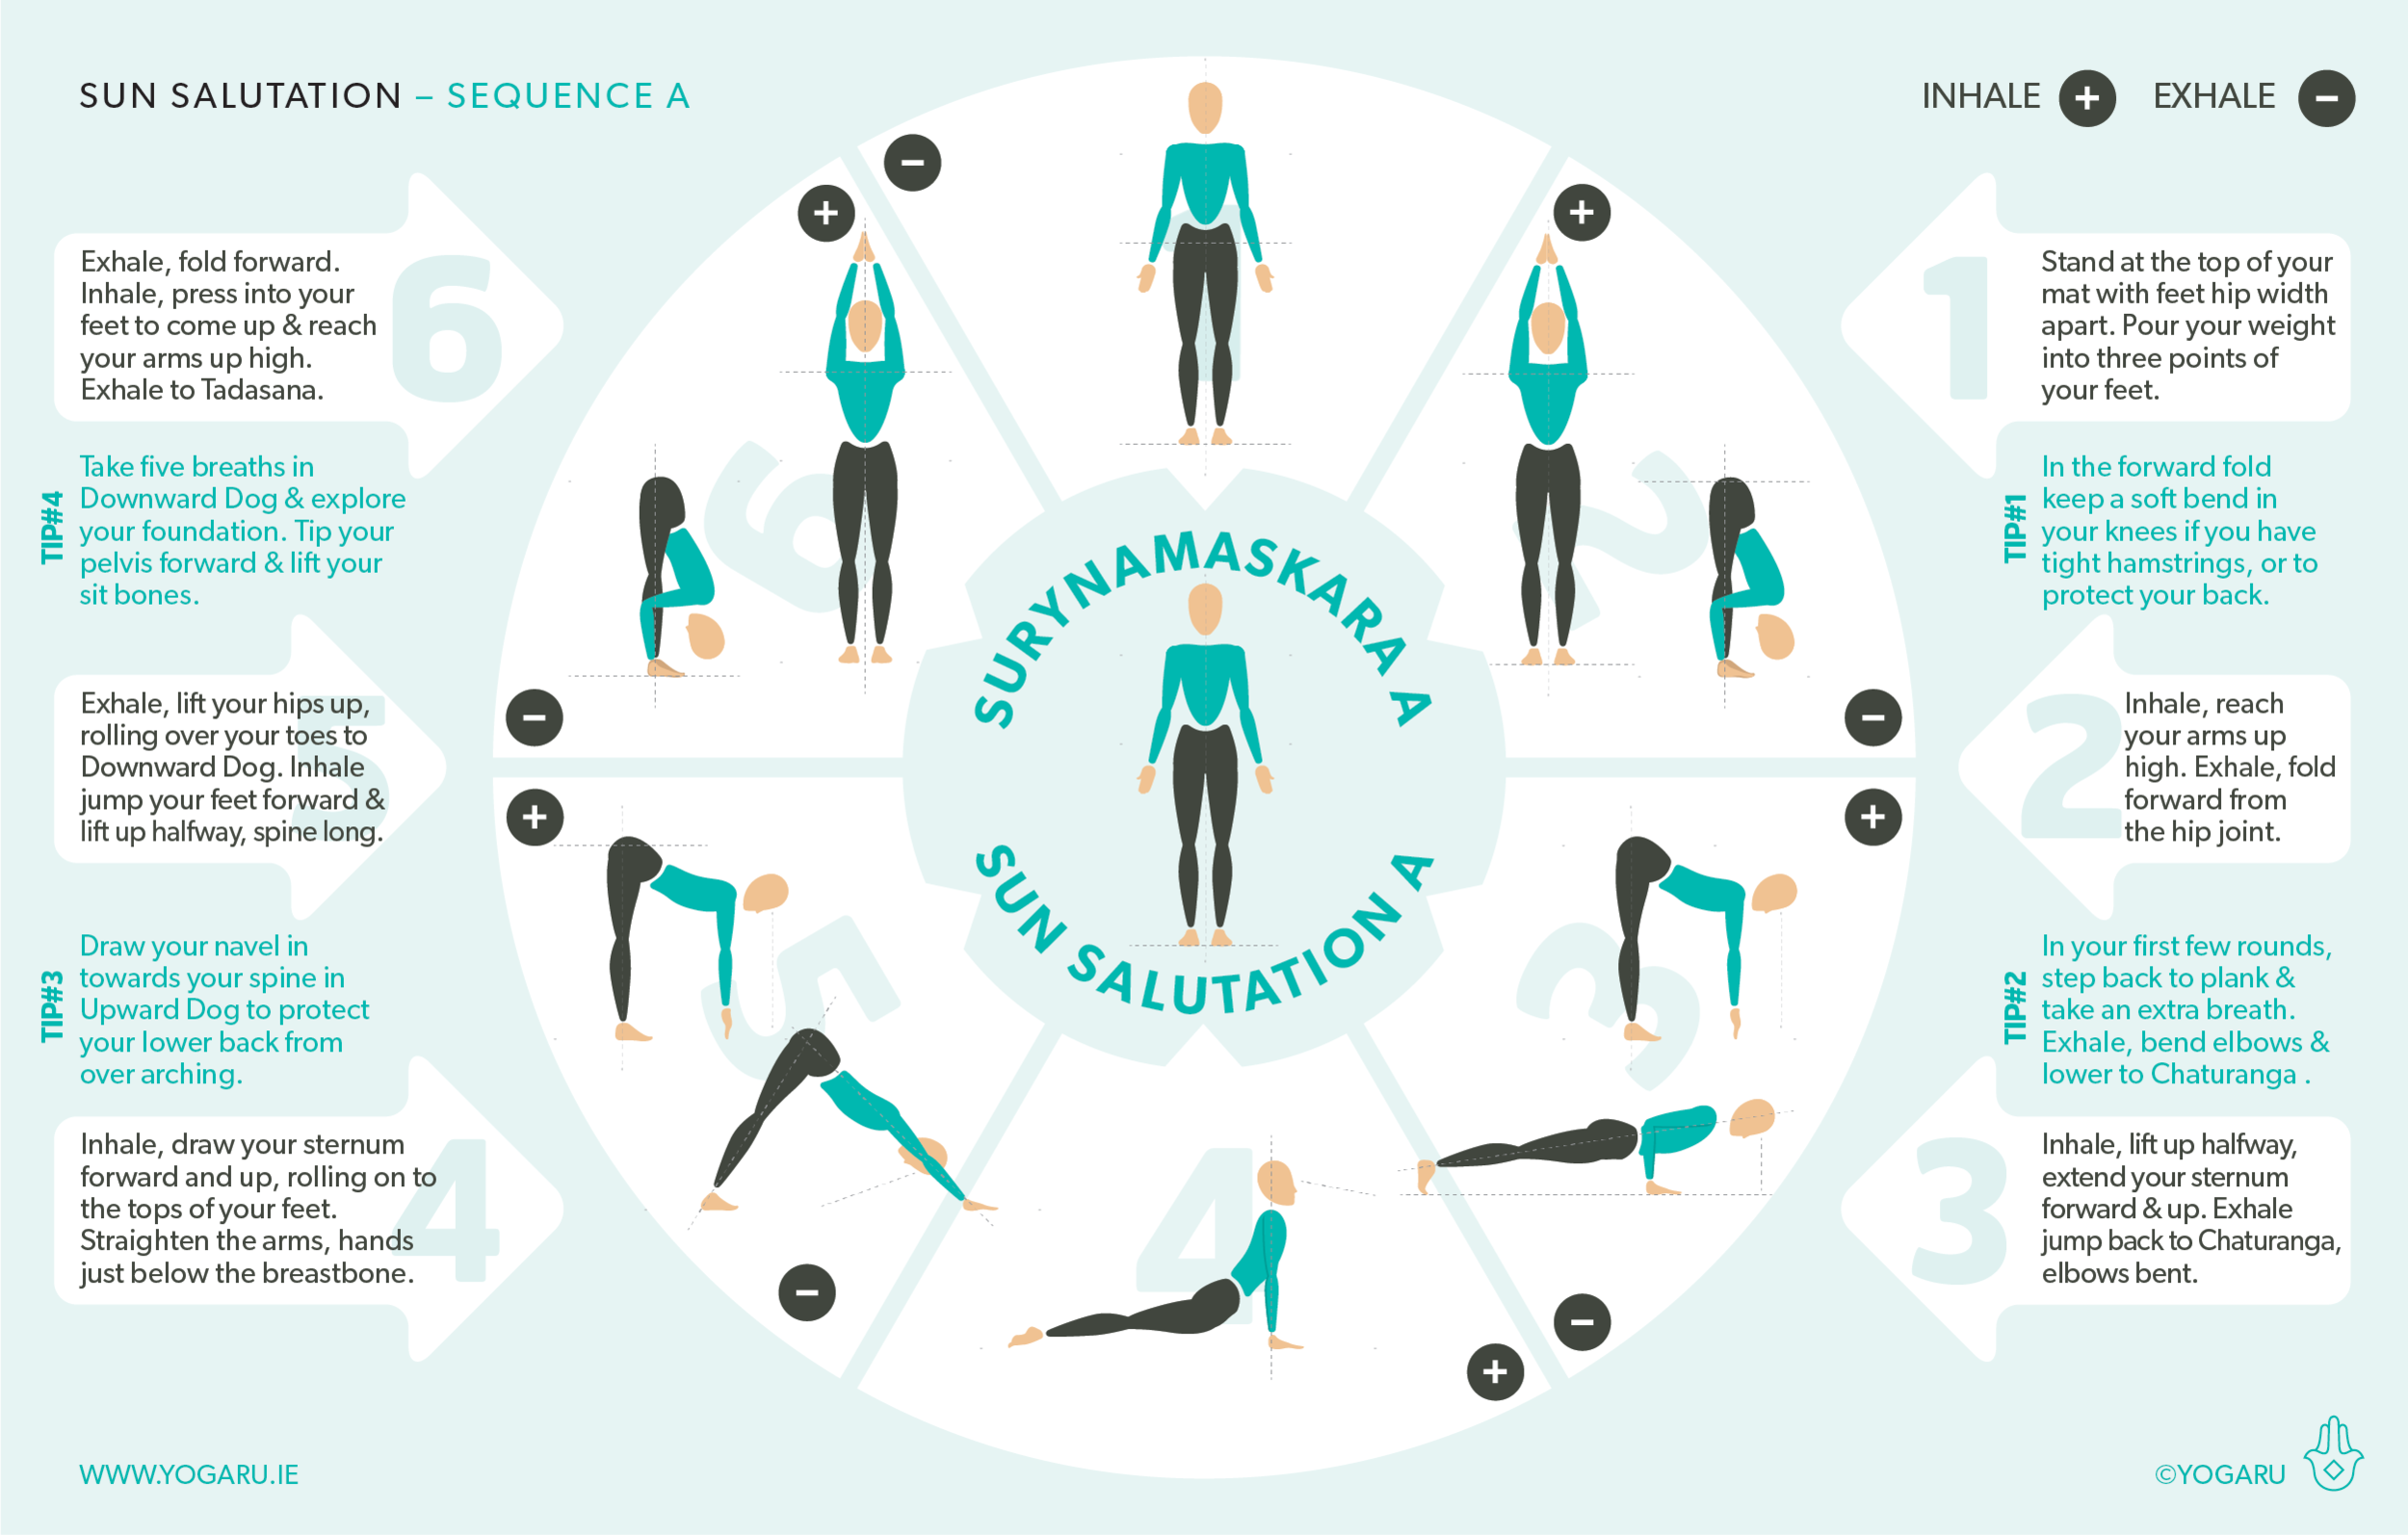
Sun Salutation A, or Surynamaskara A, is also the perfect way to start to your practice. Chose from one of the two option for Sun Salutation A above. In the first option you come down to the floor through Knees, Chest, Chin. You can stay with this version if it suits or move to the second option of Chaturanga Dandasana/Four Limb Pose and Urdhva Mukha Svanasana/Upward Facing Dog when your shoulders and back are warmed up enough to support the correct alignment.
Sun Salutation/Surya Namaskara B, or Sun Salutation/Surya Namaskara B, is actually the most challenging version of the three. It builds on the poses of Sun Salutation/Surya Namaskara A, with the addition of Utkatasana/Chair, and Virabhadrasana I/Warrior I. Warrior I requires your hips to be very open, and exposes any instabilities or tightness you might have in knees, hips or lower back. It also offers a lovely stretch in the psoas, strengthens and stretches the thigh, calves and ankles, and stretches the shoulder and neck when the raised arms are added into the pose.
Click on any of the above sequences and print them out to use as a visual aid for your next home practice.
To save the images for personal use click and hold down the image until the ‘save image’ option appears; on Mac hold down ‘control’ and click the image to get the option box; on PC right click on the image to get the option box. Scroll down in the ‘option box’ and click ‘save image’.
Ruth Delahunty Yogaru


