Anatomy 101

Anatomy 101 - hypermobile joints

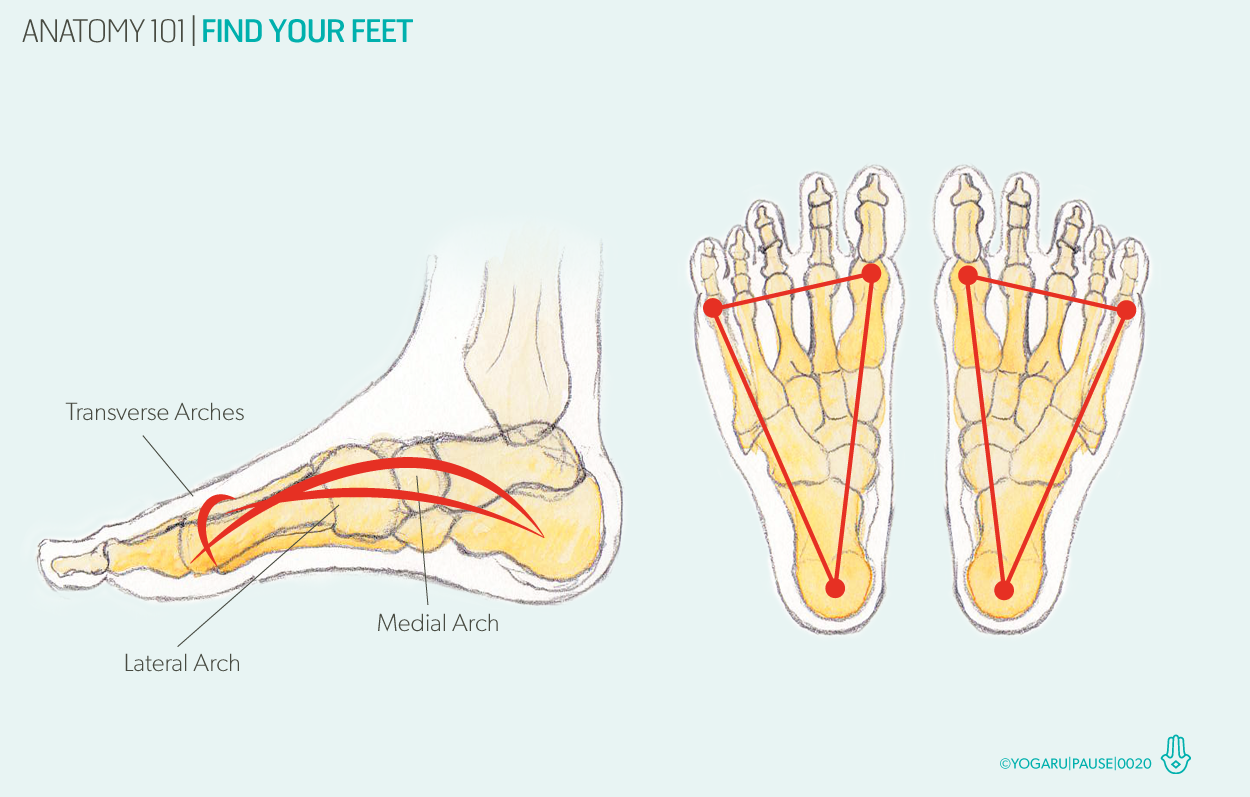
BALANCING FLEXIBILITY & STRENGTH
You see a lot of bendy elbows and knees in a typical yoga class. Flexible people tend to like yoga. We probably enjoy the fact that, in the beginning, we seem to be good at the physical aspect of it. There may be other factors to consider. Often, people who are less flexible think that they are at a disadvantage in a yoga class. How wrong they are!

Many people who seem to be very flexible (and plenty of people who don’t think of themselves as being flexible) have one or more hypermobile joint. A hypermobile joint moves beyond the normal range of motion. Knees turn inside out; elbows make strange angles when fully extended; thumbs bend to meet wrists; palms easily meet the floor in forward folds. For the majority of people, if you take care of your joints they won’t cause too many problems. Occasionally hypermobility can be more serious. Hypermobile joints are more susceptible to dislocate. Sometimes they can dislocate multiple times – then you really notice it.

POSES DON’T HAVE ALIGNMENT
Yoga is many things, one of which is a search for balance. In our asana practice, we balance right with left, effort with ease, and we aim to find a balance between strength and flexibility.

Recently, I read an article that quoted Leslie Kaminoff (Yoga Anatomy), as saying “poses don’t have alignment, people do”. Put simply, there is no perfect pose, there’s only the perfect pose for you. It follows that the alignment cues that are beneficial for one person may not be suitable for another. This is particularly relevant when it comes to yoga students who have one or more hypermobile joints.

HYPERMOBILITY IN YOUR PRACTICE
In the case of flexibility, you really can have too much of a good thing. Joints that are supported by strong muscles are less likely to be injured in sports and in yoga practice. Joints that move beyond the normal range of motion, and that aren’t supported by adequate muscle are much more likely to be injured.

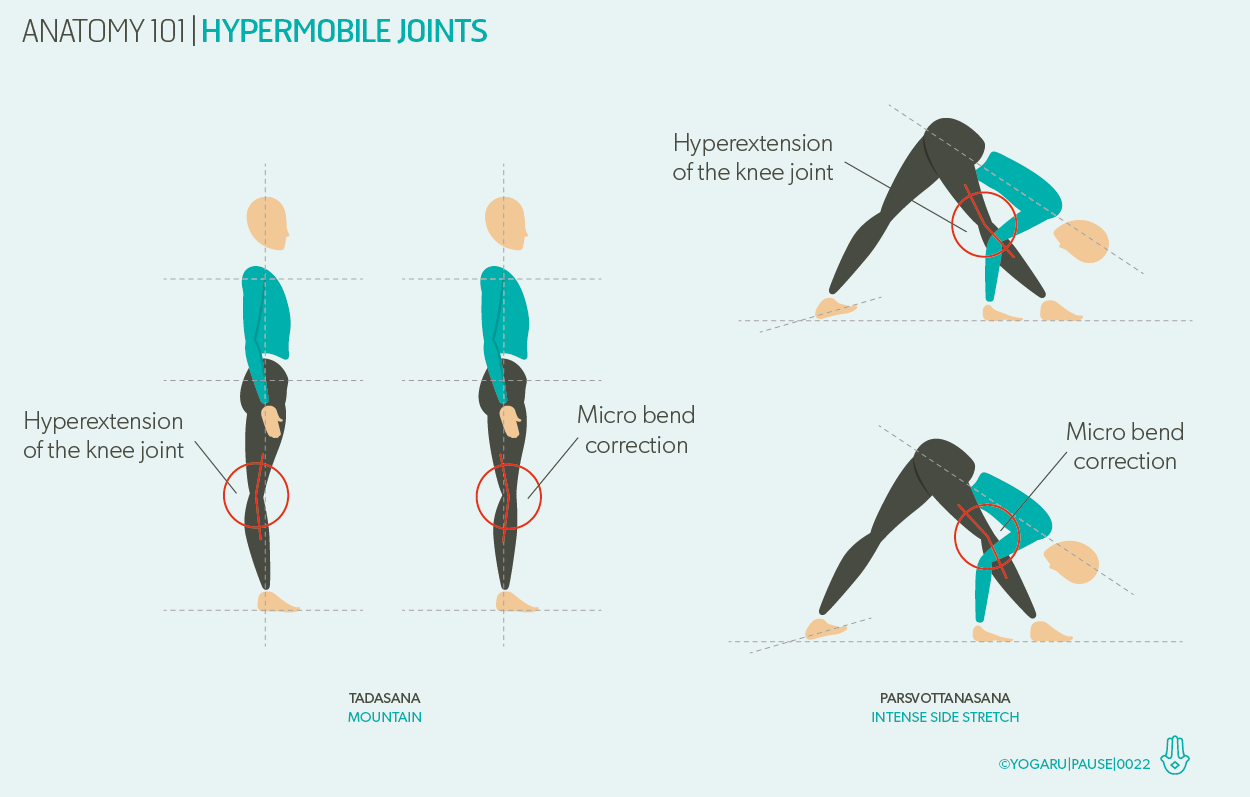
In Tadasana/Mountain or Parsvottanasana/intense side stretch a micro bend at the knee can be helpful for lots of people, particularly those who have hypermobility in the knee joint. If your knee moves beyond the normal range of motion, a cue to straighten your leg might lead you to extend beyond straight. Instead, take a micro bend at the knee – a bend so slight that it is barely visible, but one that causes the muscles around your knee to engage and support the joint.

The same applies to the elbows in Vasisthasana/Side Plank. When weight is taken in the arms, a slight bend can help to activate the muscles that support the elbows so that the weight of the body isn’t “dumped” into the joints. In a pose like Vasisthasana/Side Plank, where you aim to balance on one hand, that tiny bend also makes it easier to soften the shoulder blade down the back into a safer position.  

In Adho Mukha Svanasana/Downward Facing Dog, we’re often instructed to melt the chest towards the thighs. If you have very mobile shoulders this cue might encourage you to drop low through your shoulders, putting an enormous amount of pressure into a joint, that is not terribly stable at the best of times. Instead, it can help to lift through the forearms as if pressing away through the front of the forearm, rotate the eyes of the elbows slightly towards each other and lift from the arm pits. With these slight adjustments, it becomes easier to support the shoulder joints with their muscles.

What is amazing is just how much difference these tiny bends and lifts make. Muscles that were rarely used are switched on and strength can be built. As a result, it often becomes easier to find a more comfortable and energised pose.

JOINT HYPERMOBILITY SYNDROME
Some of us bendy folk, myself included, have more than one hypermobile joint. In my case, after a period of ongoing pain and discomfort, I was diagnosed by a physiotherapist as having joint hypermobility syndrome. Several members of my family have it too.

In class I see a lot of people who have hypermobility in their joints, and some of them probably have joint hypermobility syndrome. Sometimes they don’t want to bend their knees or pull back from the full expression of the pose, to the gradual detriment of their joints.

I am particularly interested by the fact that many hypermobile people seem to find it difficult to stay still. There is a theory that we seek comfort from the feedback we get from a joint, and that people who have a hypermobility syndrome find it difficult to find that feedback – hence they want to stretch and lengthen their bodies, often moving more than other people do, in a search for comfort.

There are other symptoms associated with widespread joint hypermobility including – pain, anxiety, heart palpitations, an over active fight or flight response, feelings of faintness, sleeplessness and digestive problems similar to IBS. It’s a topic that has been widely studied within the medical community, and more is being learned all the time about hypermobility and conditions associated with it.

YOGA & HYPERMOBILITY
I've now come to believe that yoga classes see more than their fair share of flexible folk because yoga helps us to calm ourselves rather than because of any boost it might give to our egos. If we can resist using our practice to increase the flexibility in our bodies, and instead practice with care and kindness for our joints, with an awareness to muscle engagement, yoga can be the best medicine for the bendiest of bodies!

Click on this link if you’d like to learn more about hypermobility.


ANNA CLARKE
The majority of Anna’s weekly classes take place within the mental health departments of Dublin hospitals. In addition, Anna teaches pregnancy yoga and post-natal yoga (for mums with babies) at Init Yoga, Ringsend. She also regularly covers classes at The Yoga Room, Ballsbridge.

To contact Anna email annamclarke@gmail.com or find her on Facebook.

Anatomy 101 - find your hands

EXPLORE THROUGH TOUCH
From a very early age we explore the world through our sense of touch. The pads of our fingers are especially sensitive, telling us the difference between hard and soft, hot and cold, rough and smooth. We use our hands to comfort ourselves, protect ourselves from danger and express ourselves in good and bad ways!!!

The anatomy of our hands is not dissimilar to our feet. Like our feet, the hands have two arches that runs from the outer edge of the palm to the space between our thumb and index finger. However, our hands are more refined and co-ordinated, enabling them to carry out the many jobs we ask of them.

YOGA HANDS
We bear weight on our hands a lot in our yoga practice, from Adho Mukha Svanasana/Downward Facing Dog to the more physically demanding Adho Mukha Vrksasana/Handstand. Hands were not built to bear weight for extended periods of time. When we practise our asana, we need to respect the delicate architecture of the hand and bring our awareness to building a good practice that supports the hands and wrists.

The key to protecting the wrists is to bring core awareness into your practice and broaden through the collarbones. When you lightly draw your navel towards your spine, activating a soft core lock, it carries some of the weight of your body and takes it out of your hands and wrists. Shoulders hunching forward in our daily activities, and in our practice, can also cause problems in the wrists. It reduces the blood flow to the arms and brings extra weight into the hands, even in something as simple as sitting at your desk.

HASTA BANDHA
In your next practice, bring your awareness to your hands; spread your fingers wide and line your middle finger with the centre of your wrist. Press into the knuckles of your fingers and your thumb and lightly press into the pads of your fingers and thumb. Notice the arch of your palms lifting and, in turn, the point where the palm meets the wrist. This is the area that can cause repeated pressure issues such as Carpal Tunnel Syndrome and Tendonitis. This engagement of the hand is called Hasta Bandha (hand energy lock). It brings a bound and rebound action of energy travelling from the support of the earth up through your body.

Illustrated above is a short sequence you can incorporate into your home practice to support your hands and wrists and keep them healthy and happy. Start with a few Cat & Cow to wake up the spine. From tabletop, reach and extend your right hand forward and your left foot back. Draw your knee in towards your elbow and use your core to lift your knee up as high as you can towards your chest. From Naraviralasana/Sphinx, press into your forearms and lower legs to lift your hips up. Play around with where your gaze is – under your chest, between your elbows and between your forearms – and notice the subtle differences to the core action. Adho Mukha Svanasana/Downward Facing Dog with knee tucks warms up the hands and the core at the same time. Finally, Plank to forearm plank can be a very challenging flow and helps to strengthen the arms and shoulders, in preparation for asana such as Chaturanga/Four Limb Staff.

Most of us subject our hands to long periods of repetitious movement at a keyboard, with our shoulders slightly hunched. To get the blood flow back into the wrists and hands make your next practice about supporting them. Print out the sequence above and explore how your wrists and hands feel after bringing your attention to them.

To save the images for personal use click and hold down the image until the ‘save image’ option appears; on Mac hold down ‘control’ and click the image to get the option box; on PC right click on the image to get the option box. Scroll down in the ‘option box’ and click ‘save image’.

Ruth Delahunty Yogaru

Anatomy 101 - find your feet

BUILDING A STABLE FOUNDATION
The human body is a spectacular feat of nature. Each body part is unique, yet works in complex symbiosis with all the other parts. Even after years of study we’re only just touching the surface of understanding the specific roles of each element of the body. The feet, one of the most fascinating body parts, often get ignored until we have an issue with them! They carry our entire bodyweight on a very small surface area, which through the invention of shoes, is reduced even further.

Our feet were cleverly designed to carry our bodies barefoot. Back when we were barefoot, the intricate muscle and bone structure rose to the challenge of constantly changing surface areas and textures. These days, our feet are constricted in shoes for most of the day and rarely experience anything other than perfectly flat, hard surfaces. When we walk or run, our feet flex and extend; they also rotate from supination (outer rotation of the foot) when we connect with the ground, to pronation (inner rotation of the foot) when we push off from the ground. This circular movement absorbs the force of impact and stores energy to propel you forward into your next stride. Notice this complex movement of your feet the next time you’re walking or running.

To keep our feet healthy, it’s important to give them a chance to spread their surface area and breathe at the end of the day. Take your shoes off when you get home and make a connection with the earth, even if it’s with socks on in your kitchen while you make dinner. Lift and stretch your toes out as wide as you can and place them back down one by one; feel your inner arches become light and listen to your feet sing with happiness!

PADA BANDHA
Start your yoga practice by exploring the three points of each foot: the ball of the big toe, ball of the little toe and middle of the heel; and root down into them equally, while at the same time feeling a lift in the arches. There are three arches in our feet: the familiar medial arch (inner arch), the lateral arch (outer arch) and the transverse arches (mid foot arches). When we root down into the three points, the arches natural lift into a triangular dome shape. This action is called Pada Bandha (foot energy lock) – it brings an awakening of the leg muscles that travels up the entire body. Building strong and flexible feet will help you find your foundation in your yoga practice, cultivating a flow of energy from the ground up. You’ll find that when you take time to focus on the placement of your feet in standing – and even seated – positions, the rooting-down effect will naturally help you achieve better alignment of your body.

Illustrated above are a few poses you can use to connect with your feet in your home practice. Start in a seated cross-legged position, lift up your right leg and hold onto your right knee. Flex and extend your foot a few times, followed by some foot circles to wake up the ankle joints. Repeat on the left side. In Adho Mukha Svanasana/Downward Facing Dog try placing a block under the back of your mat and notice the difference it makes when your heels have a surface to press into. From kneeing, tuck your toes under to stretch out your arches. Then place them nail side down to counteract the arch stretch and lengthen out the front of your feet. Place a brick between your calves in Utkatasana/Chair and press down firmly into your right foot; circle your weight into the ball of your right foot, the outer edge, the centre of your heel and the inner edge. Repeat on the left side. Staying in Utkatasana, lift your heels and feel the micro-movements in the balls of your feet at they work out where your balancing point is. Finally come into Malasana/Squat with your hands on the floor for balance, open your knees out to the sides and walk your feet together until the soles of your feet are touching. Slowly start to find your balance and work towards holding your hands in prayer position at your heart.

Having an awareness and appreciation of your feet will not only benefit your yoga practice but also your day-to-day activities. Print out this foot sequence and try to incorporate some of the asana into your home practice. Maybe even commit to giving your feet an Epsom salts bath once a week and feel the benefits of giving them the love and attention that they truly deserve!

To save the images for personal use click and hold down the image until the ‘save image’ option appears; on Mac hold down ‘control’ and click the image to get the option box; on PC right click on the image to get the option box. Scroll down in the ‘option box’ and click ‘save image’.

Ruth Delahunty Yogaru